Telechron Electric Clock Repair Tips
Telechron/G.E. electric clocks tend to run for decades with no complaints, yet sometimes they get noisy and/or stop working. The intent of this page is to provide a(nother) source of informative tips on revitalizing these (usually) nice vintage clocks.
Relubrication
Background
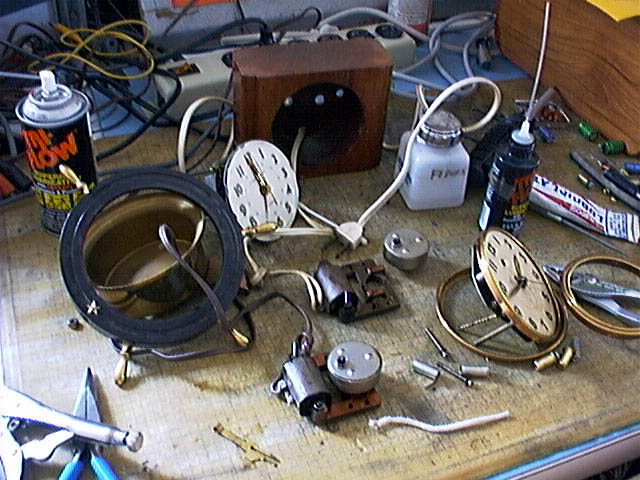
These clocks are plenty old enough to have had their lubrication become gummy, dried out, or otherwise no longer viable for its original purpose. It’s pretty likely that the whole exposed gear assembly will need cleaning and lubrication. This is (or should be) straightforward, so will not be covered on this page, beyond mentioning that i like to use a strong solvent (i’m presently using Fedron®) to remove the old lubricant, followed (once dry) by a good Teflon®-based light oil (i am presently using Tri-Flo®).
The tough, and often essential, challenge is lubricating the gears and whatnot inside the sealed motor rotor units on these clocks—the heart of the Telechron design. When these were current products, one could merely buy a new rotor assembly for some reasonable price (50¢? $1?, $2?). Not likely in modern times! The only opening is the very slight clearance between the output gear shaft and its bearing. Seem impossible? Read on!
Early Method
Some clever person in the 1950s or 1960s figured out that one can set this little “can” on top of an incandescent light bulb of, say, 60 to 100W. The old oil heats up, expands, and seeps out of the gear shaft opening (assuming there is any old oil left in any sort of fluid form!). One soaks up any old oil, then applies new oil and removes the assembly from heat. Suction is created, and the new oil is sucked in. One keeps adding oil until the assembly refuses to accept any more.
As a child i read of this method in several popular publications of the time. The only presentation of this method readily findable in my paper files is from p. 72-73 of the March 1975 edition of Popular Electronics. John T. Frye, W9EGV, wrote a regular column Mac’s Service Shop. Written in story format, it was usually a narrative between shop owner Mac and a journeyman tech, in this edition named Barney. This edition’s column was How To Service A Clock Radio. For the benefit of posterity and hoping any copyright owner won’t be offended (i’ll take it down if so), here’s the relevant portion of that article [with occasional notes from me which were not in the original in brackets like this]:
[Mac:] “Now you’re ready to put fresh oil in the case. To do this, rest the little turret of the case on top of a lighted 100-watt [incandescent] light bulb for ten or fifteen minutes until the case is quite hot—too hot to handle with your bare hands. The little gear will be up; and if you watch closely around the shaft, you will eventually see hot oil bubbling up around it, driven out by the expansion of the heated air inside the case. When no more air can be seen bubbling out, use a glove to lift the motor off the bulb and set it down on a flat metal surface. I use an aluminum sheet to conduct away the heat. Place two or three drops of a light oil, such as 3-in-one [sic: the lubricant was usually stylized/presented as 3-in-1. This was 1975. There are many superior choices now] on top of the gear so that it runs down and surrounds the shaft. Usually the shaft sits down in a small depression that will hold a small amount of oil. Watch closely, the oilcan in your hand, and soon you will see the oil disappearing, sucked into the case by the cooling, shrinking volume of the air in the case. This is your cue to apply more oil because it’s essential that all the suction be applied to oil instead of mere air. You must watch closely because when the oil starts into the case it goes rapidly. Unless you’re ready with more oil, the supply around the gear shaft will be exhausted before you know it.”
[Barney:] “Do you do that just once?”
“I usually go through the heating-cooling sequence twice to insure getting enough fresh oil inside the case to last.[…]
He also mentions testing the rotor before putting it back into service: putting something protective (he suggests glove leather) around the gear and using pliers to turn the gear:
“Since you’re driving a speed-reducing gear train from the low-speed end, you’ll encounter considerable initial resistance to turning the gear, but this will lessen as you apply a steady, light torque to the gear. You should be able to turn it easily in either direction.”
Improved Method
Most recently revised 14 June 2021.
I have used the above method in the past, and it does work: my original 1970s treatment was good for over 20 years… especially noteworthy since i was using vegetable-based 3-in-1® oil and did not clean nor lubricate the exposed gearing.
Each subsequent attempt has included experimenting with different techniques to maximize the efficacy of the relubrication. While it is too early to tell if any of these will last as long or longer than the original method, the early results seem sufficiently good to keep using the improved methods.
I did find that my March-April 2008 iteration of the oven timer clock motor pictured in this section of this article only lasted until June 2021 before getting unacceptably noisy.
Here is an outline of my current optimized method of rotor treatment. It is assumed that the clock has been disassembled and the motor assembly removed:
- If the rotor still runs, measure the temperature rise of the motor as it is:
- Use an IR thermometer and/or attach a thermometer:
- Run the motor until it has reached its full operating temperature, and note it.
- Use an IR thermometer and/or attach a thermometer:
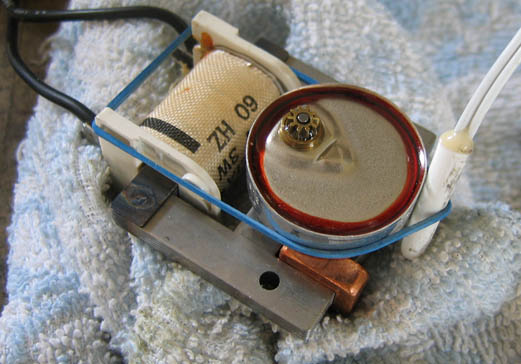
- Push the rotor assembly out of the stator frame to separate the two.
- Read the markings on the rotor. Sometimes there may be a temperature rating. Note that 60-C is likely 60 Hz (C = cycles), not 60°C. Similarly 50-C would likely be 50 Hz. If there is a temperature rating, be sure to respect it! Here is an example of what’s on the rotor pictured in this section, from a G.E. Model 3AST51BA143A1F clock/timer with a 1983 date code in a Thermador wall oven:
S1	SD	10P	M3637		TELECHRON
3.6	RPM	60-C	3018		OF USA
- Apply solvent on and around the output gear, to remove whatever old lubrication is easily removable.
- Place the rotor, gear side up, on a source of heat. I discuss sources of heat and temperatures in a separate section below. Plan to remain present during the heating and cooling process.
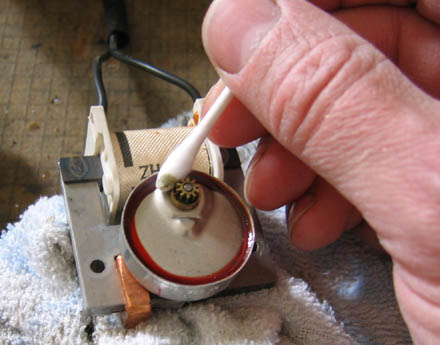
- As the rotor assembly heats up, stand by with a dry rag and some cotton swabs and remove any and all old lubricant and/or other residue which manages to make its way out of the rotor case
- When the unit is piping hot and nothing more will come out (sometimes there are air bubbles, other times not), remove the rotor from the heat source and apply your choice of solvent (if it is safe to do so) or high-quality lubricant. Hopefully whatever you apply will be sucked in in short order… keep applying the chemical and allow the rotor assembly to “drink” as much as it wants, or 1.5 to 2 cc, whichever comes first.
- During the above cooling process, when you feel the rotor assembly is cool enough to put back into the stator assembly, do so, and run the motor. The movement of the internal parts will hopefully encourage chemical distribution and “shake up” as much of the remaining old oil as possible. As well, it may help to shake the rotor assembly in various different planes whilst holding it in your hand, to further agitate the liquidy innards.
- Once the rotor is accepting no further chemical when running, unplug the motor and let the rotor fully cool down to room temperature. For best results, don’t rush this step, which may take an hour or longer with natural cooling. Stand at the ready to add more of your chosen chemical as the rotor continues to cool, unless you have already reached the 1.5 to 2 cc limit.
- If you are doing a two-cycle process with a solvent first (recommended), repeat steps 5-9, using your preferred lubricant this time.
- Put the rotor back into the stator, and test the motor: it should run smoothly and quietly, both lying flat gear-up as in the photo below and in its normal operating orientation.
- It is possible that some lubricant will percolate back out. To avoid this happening once everything is reassembled, run the motor until it has reached its normal operating temperature, then a few minutes longer, continuing to remove excess oil as needed:
There will not always be this sort of percolation. Indeed on the same rotor it happened during the 2008 treatment (pictured), but not during the 2021 treatment. I even reassembled the motor in the timer/clock mechanism with the motor output gear in a vertical orientation and ran that on my bench to let any excess oil leak out there instead of in the oven control panel: nothing.
Heat Sources and Temperatures
“Before” Heat Rise
During the June 2021 rejuvenation, the oven clock/timer rotor described above had about an 18°C temperature rise above ambient before treatment (and was noisy).
Classic Incandescent Lamp Bulb Method
We know the classic method used a 100W incandescent bulb. Sources indicate that those are about 2.6% efficient, so that’s about 97.4W of heat. That’s nice, but not knowing the thermal transfer efficiency between the bulb glass and the aluminum rotor case, unhelpful. In the interest of science, i tried the old method for the first time in nearly 50 years.
In my testing it only took about 6 minutes for the rotor to stabilize to around 62°C, with the old (existing) oil bubbling out. The original protocol recommended 10 to 15 minutes of heating. The temperature remained right about here (maybe up a degree celsius) over this time span, still bubbling. Because i may have measured wrong, the actual temperature may have been closer to 67°C, which is what i got focusing the IR thermometer on the darker small output gear.
It took about a quarter hour from the removal of heat for the rotor’s outer case to return to ambient room temperature per the IR thermometer. Note that this is not long enough for full cooling, unless maybe assisted by freeze spray or similar. Instead of that i recommend letting the rotor cool naturally.
There are several issues with the classic method:- Balancing a rotor atop a standard incandescent light bulb is not easy, and not stable
- Seeing anything like bubbling oil near the dark gear is very difficult against bright backlighting from the lit bulb
- Finding an appropriate incandescent bulb is no longer trivially easy
Warming Tray + Variac Method
I’ve had better success with a run-of-the-mill coffee warming tray:
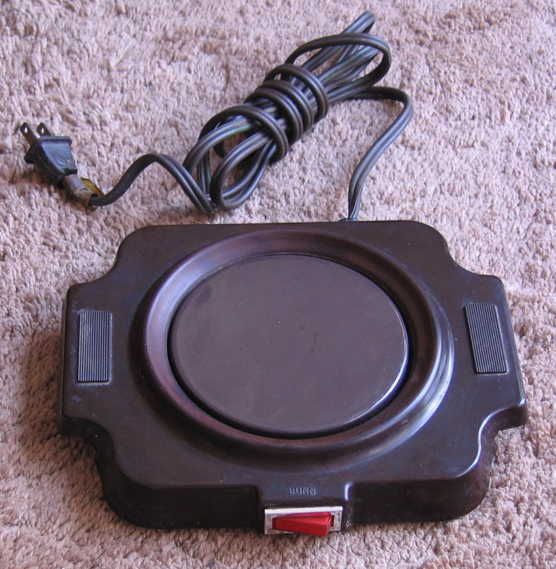
This one’s a Bunn model BCW (which i’m taking a wild guess is an abbreviation for Bunn Coffee Warmer). Anything of this general nature should work. Rated at 60W, plugged directly into wall power as usual it runs too hot: 110°C. If you have a different kind of product with variable temperature, that may be sufficient. My workbench happens to have a Variac® adjustable autotransformer, which i use to reduce the voltage feeding this warming appliance down to what gives the rotor under rejuvenation the heat it needs but not more. If your device is purely resistive like this one, likely you can get away with a standard triac-based light dimmer, but please be careful and any issues are on you. Two matching units wired in series and do 2 rotors at once, or a 60W incandescent light bulb in series and compare/contrast the classic and improved methods side-by-side on 2 different rotors—the possibilities are practically endless.
Power reduction (if used) will be specific to your device, and likely the position of the rotor on the device. On the one i have, there is a hot spot in the exact center, conveniently about the size of the back of the clock motor rotor. Putting the back (small part, turret) of the rotor there allows me to apply a lower voltage and save energy. In 2008 i used about 60V into the warming tray. In 2021 i used closer to 42V. Different temperature choices and (mis)measurements likely account for most of this broad difference.
So far i’ve been using about 60°C as the terminal temperature as (mis)measured on the rotor case. This seems to be about what a 100W bulb manages using the classic method, so i figure it’s OK. The same 10-15 min. of heating as for the classic method so far seems appropriate.
Cool-down took well over an hour. It didn’t drink in all the new oil right away, though it did keep taking it in for a long time. It might have been closer to 2 hours… i didn’t track it carefully (was doing other things).
“After” Heat Rise
Two samples, same rotor (same one already mentioned):
- 2008: 13°C rise above ambient (17°C).
- 2021: 5-15°C (bad measuring) rise above ambient (26°C). Rotor case uncomfortably warm to hold a long time. Metal frame laminations too hot to touch for more than a few seconds.
Variations on the Rejuvenation Theme
Likely dozens. One i’ve not yet tried is using a really good penetrating oil at the get-go, with the rotor cool or cold. I’d likely let it sink in a day or several. The goal here would be having the penetrating oil loosen up dried/caked oil inside the rotor, so more would come out with heating. It might even refresh the existing oil sufficiently that the full lubricant change procedure might not be necessary.
Is It Done Yet?
Once rejuvenated:
- There should be some axial play of about 1 mm (on the rotors i’ve worked on).
- When the rotor is shaken side-to-side, the inner gears should rattle.
- It should be possible to carefully turn the gear with pliers (with gear protection!)
Other Alternatives
One popular alternative method involves carefully drilling an access hole into the rotor housing. Another, a variant of the methods above, uses vacuum to assist pulling out what’s inside the rotor.
If you want to follow the current state of relubrication art, including the techniques mentioned in that last paragraph, i know of no better place than the Telechron Forums > Telechron & G.E. Clocks. Try a search on (no quotes) “rejuvenat” (note that this is a stem for both rejuvenate and rejuvenating) and you should find some illuminating (and likely more recent and/or informed) results.
Other Sources of Telechron/G.E. Information
- Telechron.net Main Page: Legendary Pappy’s site, which has moved between various domains over the years. Includes the Telechron Forums. Pro tip: if this site goes away like others in the past, try searching on Telechron Pappy or Pappy Telechron on your favorite search site and you’ll likely get to the correct place.
- Telechron Electric Clock History at ClockHistory.com
- Mike’s Clock Clinic’s Electric Plug In Clocks Service Charges Page: Much more here than just service charges.
 World O’ Appliances/Household/Plumbing/Irrigation/HVAC/Hardware